Roast Potatoes

Method 1

Crispy Outside – Fluffy Inside (more time consuming but better)

  1. Preheat over 410 degrees F
  2. Peel potatoes if they are rough skinned. If they are smooth skinned, scrub well and leave on or peel if desired.
  3.  Cut into large bite sized chunks. Wash excess starch off with cold water.
  4. Place them in a saucepan large enough to accommodate them, cover with cold water, and add a teaspoon coarse salt.
  5. Set over high heat, cover, bring to a low boil, then lower the heat to medium and cook for 5 minutes.
  6. As soon as the water boils, pour the 2 or 3 tbsp vegetable oil into a rimmed baking sheet, and place the sheet in the oven, so the fat and baking sheet will heat up
  7. Drain and return to pot.
  8. Allow to steam dry about 3 minutes.
  9. Shake and toss potatoes very hard in the pot to chuff them up – the surface of the potatoes should look fuzzy – this is what makes the potatoes extra crispy on the outside.
  10. Remove the baking sheet from the oven, pour the potatoes onto the sheet, sprinkle with sea salt, or other flavor *combinations (see flavor combinations) and stir well to coat with the fat.
  11. Return to the oven and bake for 25 to 30 minutes, flipping the potatoes halfway through, until cooked through (when you insert the tip of a knife in one of the pieces, it should meet no resistance), crusty, and golden. If you want a little more color on them, you can switch to grill mode for the final few minutes.

Method 2 – Quick and Easy

If you don’t have time to parboil, shake a pot, etc. This is an easy alternative – although not quite as delectable.

  1. Peel or scrub potatoes.
  2. Cut into bite sized chunks.
  3. Place in large ziplock bag or in large bowl
  4. Pour several tbsp of vegetable oil or olive oil over potatoes.
  5. Add flavor combination.
  6. Shake or stir.
  7. Pour onto pan.
  8. Bake in oven at 410 degrees F for about 1 hour or until tender and golden.
  9. It is good to flip them at some point unless you are using stoneware – then it’s not usually necessary.

Roast Potato Flavor Combinations

  1. Toss with Olive oil and Dry Onion Soup mix.
  2. Season with good ol’ Sea salt and Black Pepper. Use butter with your oil.
  3. GARLIC: Try your favorite garlic pepper blend.
  4. ITALIAN: Marinate in Olive oil, Golden Italian Dressing and season with Lemon pepper & cayenne
  5. GREEK: Marinate in Olive oil, Greek Dressing and season with Parmesan Cheese, salt & pepper.
  6. HONEY MUSTARD: Dice and onion, sprinkle over potatoes that are placed in an oiled roasting pan. Melt some honey and add a tsp of dry mustard and some salt and pepper. Drizzle over potatoes.
  7. Try SWEET POTATOES instead of regular potatoes.
  8. CAJUN: Use Cajun spice – or make your own using garlic pepper, Cayenne and paprika.
  9. BALSAMIC: Roast with salt and pepper. During last 10 minute of cooking – drizzle with balsamic vinegar.
  10. LEMON DILL: Use oil and melted butter. Add lemon juice, crushed garlic or garlic spice blend, and dill weed.
  11. LEMON: Lemon juice, garlic spice blend, paprika.
  12. Dip any of these flavor combinations in various dressings such as ranch or creamy cucumber or sour cream.
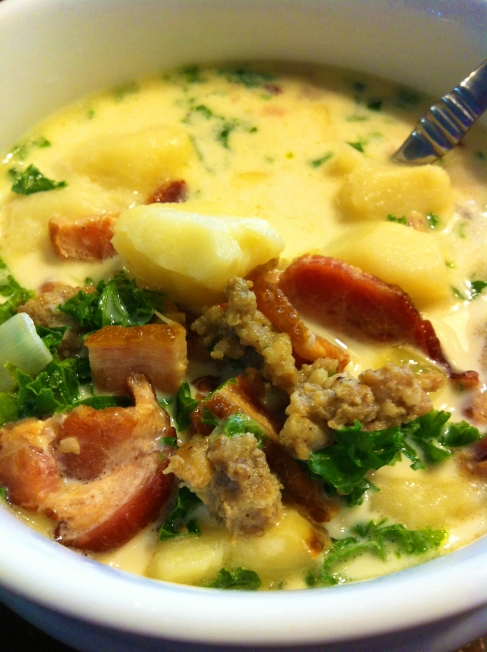
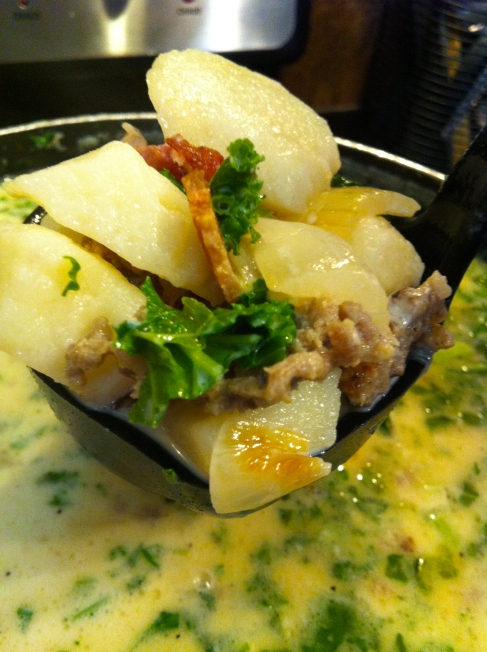
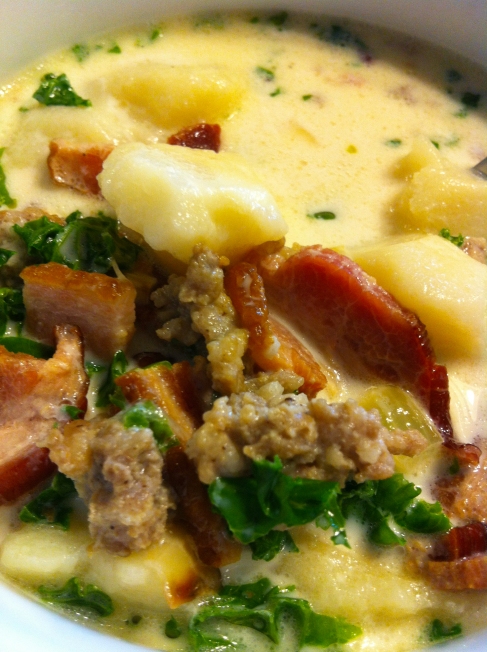
Tuscana Potato Soup (Olive Garden Rip-Off – but BETTER!!!)

Image

This makes a HUGE pot because I have a large family – so you may need to scale it down.

8 potatoes – baked, cooled, skinned, chopped

1 package bacon

1 – 2 lbs italian sausage (I use mild)

2 large onions

6 cloves garlic, pressed or minced

2 liters (about 8 cups) half & half cream

2 cartons (900 ml – about 3.8 cups) chicken soup stock (I use Campbells)

bunch Kale, finely chopped

Salt & Pepper to taste

Instructions

1. Scrub potatoes. Poke with fork. Bake about an hour then cool.

2. While potatoes are baking and cooling, fry bacon in fry pan until crispy. While bacon is frying, chop onion. Drain bacon. Put bacon into your soup pot.

3. Clean bacon fat out of fry pan, add Italian sausage, onion and garlic. Fry. When done frying, add to soup pot.

4. Add chicken soup stock to soup pot. Heat until quite hot.

5. Add Half & Half cream and continue heating. Heat but do not boil or the cream will curdle.

6. While soup is heating, chop potatoes – skin on or off (your preference) into bite size pieces, add to pot.

7.  Add salt & pepper to taste. You should not need much salt – if any.

8. Finely chop Kale and add during the last 5 or so minutes of cooking.

Tuscana Potato Soup (Olive Garden Rip-Off – but BETTER!!!)

Image

This makes a HUGE pot because I have a large family – so you may need to scale it down.

8 potatoes – baked, cooled, skinned, chopped

1 package bacon 1 – 2 lbs italian sausage (I use mild) 2 large onions 6 cloves garlic, pressed or minced

2 liters (about 8 cups) half & half cream 2 cartons (900 ml – about 3.8 cups) chicken soup stock (I use Campbells)

bunch Kale, finely chopped

Salt & Pepper to taste

Instructions

1. Scrub potatoes. Poke with fork. Bake about an hour then cool.

2. While potatoes are baking and cooling, fry bacon in fry pan until crispy. While bacon is frying, chop onion. Drain bacon. Put bacon into your soup pot.

3. Clean bacon fat out of fry pan, add Italian sausage, onion and garlic. Fry. When done frying, add to soup pot.

4. Add chicken soup stock to soup pot. Heat until quite hot.

5. Add Half & Half cream and continue heating. Heat but do not boil or the cream will curdle.

6. Add salt & pepper to taste. You should not need much salt – if any.

7. Finely chop Kale and add during the last 5 or so minutes of cooking.

ImageImage

A family favorite that will now be back on my regular menu thanks to being able to quickly slice potatoes with my Borner Slicer.

The other day I made a HUGE pot. I thought it would last two or three days. It didn’t.

I do not have actual quantities for this recipe. It’s a throw together to your liking dish.

Ground Beef  (lean. Extra lean is even better. Regular is too greasy)

Onions

Carrots

Potatoes

Tomato Soup (canned – the NOT ready to serve variety. Campbells is best)

Method

Place ground beef in bottom of a large oven safe pot or casserole dish. Season to your liking with seasoning such as onion salt, garlic salt, celery salt, salt & pepper, a little cayenne, maybe some seasoning salt. Mix well with hands. Press down lightly.

Peel and slice onions. I like to use a LOT of onions. Don’t break the slices up so they are in individual rings – just leave them. Place them on top of the hamburger. Over lap them. Don’t scrimp on the onions. Kids can pick them out if they don’t like them later. I layer them pretty thick.

Carrots: – peel and slice. You can do these anyway you like. You can do big chuncks, thin slices, carrot sticks or just toss in a bag of baby carrots and skip the peeling and slicing. I personally like my carrot chunks quite large. I usually use baby carrots unless I am too broke. Place a thick layer over the onions.

Potatoes: – peel and slice. Again – thin or thick – personal preference. Thick layer on top of carrots.

Tomato Soup: – for my family, I use 3 cans. 2 would probably be sufficient but I like mine quite saucy. Keep in mind, I have 8 people in my family and so I am using the biggest pot I own for this. If you are using something like a 9 x 13 casserole or a smaller pot – 1 or 2 cans is plenty. Spread over potatoes.

Salt and pepper the top.

Cover with pot lid or tin foil and place in 350 degree f oven until done. About 2 hours. Poke with fork to test for carrot tenderness as they take the longest to cook. The ground beef SHOULD be done when the carrots are done. However, because e-coli is a VERY VERY VERY nasty illness, make sure you cook it long enough the hamburger is done.

I cooked Tin Foil Dinners in a Pot a couple of days ago. I don’t know why I always forget about this absolutely amazing, super easy, relatively inexpensive, very hearty, favorite family recipe. I think I avoided it because I hated peeling and slicing potatoes. BUT – at the trade show awhile back, I came across my very favorite slicer for sale! I was so happy!! My slicing woes are over and Tin Foil Dinners in a Pot will be on the menu MUCH more often! http://www.kitchenniche.ca/mandoline-vslicer-plus-p-1379.html

WHY I LOVE THIS SLICER

It’s a pretty well known fact I got married when I was 16. No, I’m not married to the same person.

While preparing for our “blessed” event, I accompanied my mom to several garage sales to find things to furnish our “home” (actually a large trailer – like – camper trailer). I have always liked to cook and I was very excited to find a “vegetable slicer” for sale for .50 cents. I had never used a vegetable slicer. My mom did not invest in such things when I lived at home – money was too tight for such luxuries.

I knew nothing about this vegetable slicer except it looked old fashioned because it was an ugly green. I figured it was purchased in the late 70s. I really have no idea how old it was – but it worked so AMAZINGLY well. It was my absolute favorite kitchen tool and was the inspiration behind my love of kitchen gadgets.

Sadly, YEARS later – and I mean YEARS – someone broke it doing something dumb.

I did not know where to purchase that particular slicer. I knew nothing about it except it worked!

Over the years I purchased many other slicers and each one frustrated and upset me. When I was a Pampered Chef distributor I was very excited to purchase their Slicer. I thought it would be wonderful – after all – it’s Pampered Chef. But no. No slicer could compete. It seemed the blades on all other slicers were the wrong shape, or were not sturdy enough. I did not want to JUST slice soft things such as tomatoes – I wanted to slice carrots, potatoes, and onions. I especially missed the ability to dice onions with my good old ugly green slicer.

I gave up on slicers. The only thing I have used my Pampered Chef slicer for is the cheese grater insert.

So – a few months ago, I attended a trade show. Lo and behold – MY SLICER!!!! But in white!!! I was estatic. Other than the colour – the product has not changed one bit. It never fails me.

I read several reviews on various web sites today while trying to find a picture of it to post. There were quite a few people who mentioned wishing it could “chop” and “dice” onions. It CAN. Here is how –

Use the large julienne blade for chopping and the small for dicing.

Attach onion to the safety holder. Make one sweep down the slicer. Turn 90 degrees. Slice. Turn back. Slice. Continue this process. It’s just that simple.


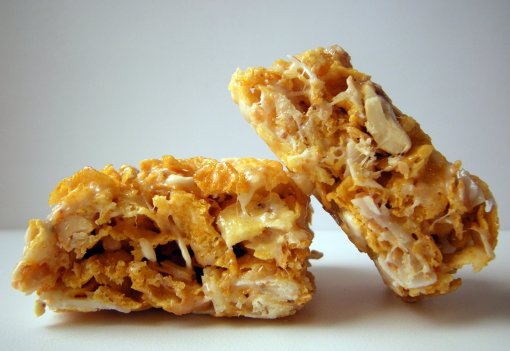
Coconut Slice

Dee-lish! (this is NOT my photo - I will replace this photo with my own soon)

60 large marshmallows or 6 cups of mini mashmallows

2/3 cup butter or margarine

2 cups almonds

2 cups shredded long sweetend (fancy) coconut

7 cups cornflakes

Options:

add other nuts such as cashews to jazz it up.

drizzle top of cornflake slice with chocolate

Melt marshmallows and margarine in large pot. Add almonds, coconut and cornflakes and stir.

Press into buttered pan. Allow to cool before slicing.

Photo from http://acraftylass.blogspot.com/2009/03/coconut-cashew-cornflake-bars.html (our recipes are slightly different. Her photo is awesome! Many great looking recipes on her site!)

My Aunt Joy made Sopapillas one time when I stayed at their house as a teen. I LOVED them. I’ve made them several times – but recently lost her recipe. I hopped online and found several recipes – all a little different. I chose two that were the biggest difference to try. Here are the results.

Please note – the SECOND RECIPE is the WINNER for the PROOF IS IN THE POOF!

It was obvious immediately that the recipe containing milk (recipe number 1) did not have poof power. Sometimes they half poofed – most times they did not poof and looked more like fried flat bread – a few of them DID poof very well. I’m not sure if I managed to roll the perfect thinness – or if the oil was just right – whatever the case – I don’t want to use a recipe that only poofs under perfect (or flukey) circumstances. My goal is for a Sopapilla that poofs almost every single time.

Side by Side Comparison Sopapilla Recipe 1 and 2

Sopapilla from Recipe Number 1 – The Perfect Poof!

Sopapillas 1 (with milk) – 3/5 Stars

Servings 12

Category Pastries

Ingredients

3 cup all-purpose flour

2 teaspoons baking powder

1 teaspoon salt

4 to 6 tablespoons lard or shortening

1 1/4 cups warm milk (approximate)

Vegetable Oil

Preparation

In Stand Mixer with WISK HOOKS combine dry ingredients. Add shortening. Mix on slow until shortening is cut in and resembles corn meal.

Add warm milk all at once. With DOUGH HOOKS mix until smooth.

Remove. Break into two balls. Cover with saran wrap and allow to sit 10 – 20 minutes.

Roll THIN – 3 millimeters. This is IMPERATIVE to the pastry “POOFING” into pillows. If they do not poof – try rolling slightly thinner – or not quite as thin. But it will be somewhere in this area.

Cut into 4 x 4 inch squares – also imperative to achieving perfect pillows you will be able to slit open to stuff.

Deep fry in med hot oil.

Sopapilla Recipe 2 (with water) – 5/5 Stars

Servings 24 Prep. time (min) 30 Cooking time (min) 15

Category Pastries

Ingredients

4 cups all-purpose flour

2 teaspoons baking powder

1 teaspoon salt

4 tablespoons shortening

1 1/2 cups warm water

2 quarts oil for frying

Preparation

In Stand Mixer with WISK HOOKS combine dry ingredients.

Add shortening. Mix on slow until shortening is cut in and resembles corn meal.

Add warm milk all at once. With DOUGH HOOKS mix until smooth.

Remove. Break into two balls. Cover with saran wrap and allow to sit 10 – 20 minutes.

Roll THIN – 3 millimeters. This is IMPERATIVE to the pastry “POOFING” into pillows. If they do not poof – try rolling slightly thinner – or not quite as thin. But it will be somewhere in this area.

Cut into 4 x 4 inch squares – also imperative to achieving perfect pillows you will be able to slit open to stuff. Deep fry in med hot oil. They should poof immediately. You may need to turn them and hold them in oil until all sides are brown – they will want to stay on the original side they were placed on.

After making the sopapillas – top them essentially however you want. We like ours tossed in an Icing Sugar/Cinnamon mix. Or with honey butter.

We most often use them for TACO’S

If they have not poofed – simply place the unpoofed sopapilla on your plate and top with taco toppings. If they HAVE poofed like they should – carefully split the top open and stuff with taco fillings!

What are Sopapillas?

Sopapillas are a type of fried pastry which originated in New Mexico, although they are related to many South and Central American fried doughs. Latin American sopapillas are different from New Mexican ones, which leads to some confusion for diners expecting one dish and getting another. A New Mexican sopapilla is a pillow-like puff of fried pastry accomplished by making a special dough which puffs up as it fries, like a doughnut. It can be served sweet or savory, depending on region or taste, and is an important element of New Mexican and Southwestern cuisine. A Latin American sopapilla is a type of tortilla

The name “sopapilla” probably originates from the Spanish sopaipa, another term for a sweet fried dough. Similar pastries include churros and bunelos, which tend to be seasoned in the same way, and are also made from sweetened fried doughs. When made sweet, sopapillas are drizzled with honey or anise syrup, and sometimes rolled in cinnamon sugar. When made savory, sopapillas are filled with beans, ground meat, or other ingredients. A sopapilla can also be eaten plain with a side of honey to dip it in, and sopapillas are always served hot, as they get heavy and greasy when cold.

The sopapilla is probably related to a wider family of fried and oil dipped breads common all over Latin America and Spain, along with the rest of the world. Most regional cooks have a soft spot in their heart for sweet, fried pastries, and the sopapilla appears to have originated approximately 200 years ago in New Mexico, although it spread quickly all over the Southwest. In parts of Mexico, sopapillas are made New Mexico style, although the name is not recognized as a food in other regions of Mexico, a nation with immensely varied cuisine.

In Latin America, sopapillas are puffed tortillas which are either roasted in ash or fried, depending on the region. Usually Latin American sopapillas are served as a dessert food, drizzled in syrup or sweet fruit, although they can also be found in a salty incarnation. They are particularly popular in Chile, although they can be found at roadside stands in other Latin American nations as well. In some parts of Latin America, sopapillas are made with squash doughs, rather than corn or wheat, which lends an intensely sweet and slightly caramelized flavor that many consumers rave about.

http://www.wisegeek.com/what-are-sopapillas.htm

Pepsi Lamb Chops - a HUGE HIT

The Pepsi Lamb Chops ARE EXTRAORDINARY!!!

Wow – I said the recipe Pepsi Pork Roast was amazing! How do I give something more than 5 stars? Oh yeah – I’m the author so I can give it as many stars as I want!

So – using the recipe for Pepsi Pork Roast – for lamb chops is a 20 out of 5 stars. Oh my goodness. I cannot begin to explain how delicious this was!!

How I Did It

Pepsi Pork Chops

(adapted from Pepsi Pork Roast)

I made a double batch since I have a big family – made 16 lamb chops – I was going to cook in the crock pot – but I didn’t get them in in time. I baked them in the oven.

8 lamb chops

1 can mushroom soup

1 packet of Lipton Onion Soup mix

1 can pepsi

Place lamb chops in deep dish baker or casserole or crock pot.

Combine soup, pepsi and onion soup mix in bowl. Pour over pork chops.

Bake at 375 F until chops are tender or on high in the crock pot for four or five hours.

Serve over rice with your favorite vegetables as a side dish.  (in picture – brown sugar carrots)

Again, forgive the terrible iPhone pic! I WILL replace it soon!

This is the very best apple pie recipe I have ever used!!! I did not even like apple pies until I made this recipe for my husband!

Best Apple Pie Recipe Ever

1 recipe for a 9 inch double crust (use your favorite or try mine)

1/2 cup butter (use butter – not margarine it is way better)

3 tbsp flour

1/4 cup water

1/2 cup white sugar

1/2 cup brown sugar

1 tsp ground cinnamon

8 GALA apples (or another sweet apple that holds it’s shape and does not turn to mush – Gala apples are best!)

Preheat oven to 425 F. Melt butter in a saucepan. Stir in flour to form a paste. Add water, white sugar, brown sugar and cinnamon and bring to a boil. Reduce temperature and let simmer.

Place the bottom of crust in your pan. Fill full with peeled, cored and sliced apples until they are mounding. Cover with a lattice work of crust (or just the regular way if in a hurry making sure you slash the top in several places). Gently pour the sugar/butter liquid over the crust. Pour slowly so it does not run off.

Bake 15 min in preheated oven. Reduce temperature to 350 F and continue to bake until done. About 35 to 45 minutes. Apples should be cooked but slightly firm.

NOTE:

I use Pampered Chefs Apple Corer/Slicer. It makes the perfect size apples for apple pie and quickly removes the core. I prefer my apples to be larger instead of sliced thin.